

The shout from the starboard lookout shattered the silence on the bridge of the British cruiser HMS Suffolk. All the bridge officers immediately rushed to the bridge wing and looked towards the starboard quarter and there they were, the two German ships they had been searching for—the heavy cruiser Prinz Eugen and the battleship Bismarck. The year was 1941.

Scarily for the crew of the Suffolk, the German ships were less than 11 km/7 miles away and their ship was well within the range of the 38 cm/15 in guns on the Bismarck and 20 cm/8 in guns on the Prinz Eugen. Realizing the danger, Captain Ellis immediately ordered the wheel on the Suffolk hard over to port and as the rudder started to bite, the British cruiser leaned over and began to come around in an arc and away from danger.

The ships were in the Denmark Strait, a narrow sliver of sea between Greenland and Iceland. The Irminger current splits off from the Gulf Stream on the Icelandic side of the strait, clearing the Icelandic side of ice throughout the year. However, the Greenland side, unaffected by the current, features extending and retreating pack ice depending on the time of year. To further reduce the width of the strait, the British had laid a minefield to the northwest of Iceland.
At the time of the German ships’ passage, it was estimated that the navigable area between the ice and the minefield was around 97 km/60 miles. It was in this area that the Suffolk and her sister ship, the Norfolk, were patrolling. Conditions were difficult; in addition to the ice and mines, wind, snow, and atmospheric conditions (which could play tricks on lookouts’ eyes), false reports weren’t uncommon. The cold air flowing over the warmer water towards Iceland also caused dense fog banks to form off the Icelandic coast. The crew of the Suffolk hoped that one of these fog banks would save them.

The German ships were expected to come from the northeast, and the two British cruisers steamed up and down the Denmark Strait in a northeast/southwest direction. It was the southwest leg that Captain Ellis feared the most, as the German ships would be coming up behind him and would be hard to spot. Although the Suffolk had radar, the radar of that time wasn’t very effective across the stern arcs of the ship.
His worst fears realized, Captain Ellis now hoped the fog the Suffolk was heading into would hide them from the German ships. He had no way of knowing if the German ships had seen him. The first sign that the Suffolk was spotted would be when German shells started falling out of the sky around his ship. The Suffolk was no match for the German ships. Her role was to find the German convoy and then direct the heavy British ships that had already left Scapa Flow to intercept. To engage the Germans would be suicide, even if it was just the Prinz Eugen. Although the Suffolk had the same complement of 20 cm/8 in guns as the German cruiser, she was built to the 10,000-ton treaty limit whilst the Prinz Eugen was not—and was, therefore, more heavily armored.
In the fog, Captain Ellis allowed the German ships to draw past his position before coming around and latching onto their port quarter at a distance of around 19 km/12 miles: the limit of the radar set onboard.
The German ships had been hoping to reach the Atlantic ocean undetected in order to start commerce raiding activities, disrupting the Atlantic convoys to and from the USA and Canada. Now that they had been spotted, Admiral Lutjens on the Bismarck had a choice: he could turn and attack his pursuers, or he could press on and hopefully get into the wider Atlantic where he had a better chance to shake them off. He chose to press on. Unbeknownst to Lutjens, the British battlecruiser HMS Hood and battleship HMS Prince of Wales were steaming out to confront him before he could disappear into the vast Atlantic.

At 05:37 on May 24, 1941, the Prince of Wales sent an enemy sighting report saying they had spotted the German ships at a distance of 27 km/17 miles, and seven minutes later the Hood sent a similar report saying the Germans were now at 23 km/14 miles. Admiral Holland, in charge of the British ships, ordered them to turn 40 degrees in order for him to shorten the range to the German ships.
Unfortunately, only the forward turrets of the British ships could fire on the German ships, but Holland knew if he could get closer and turn, he could fire a greater broadside than the Germans could. Also, at greater ranges, he knew that his ship the Hood was in danger of being hit and damaged by a plunging shell due to her lack of deck armor and that this risk decreased the closer he was to the German ships. He was also concerned about the Prince of Wales—rushed out of the shipyard, she still wasn’t battle-ready—in fact, she still had civilian employees onboard trying to fix various issues, especially with her guns.
Holland made another signal, and the two British ships turned another 20 degrees toward the German vessels. Slicing through the ocean swell at 28 knots, both British ships closed in on the Germans, the Prince of Wales 750 m/0.5 miles or so behind the Hood.
The four ships were now just over 19 km/12 miles apart. On the German side, the Prinz Eugen was leading the Bismarck. On the British side, the Hood was leading the Prince of Wales. Holland’s plan was to concentrate the attack on the Bismarck first. At 05:52, the fire gong sounded on the Hood and she fired her first salvo of shells—not at the Bismarck, as planned, but at the Prinz Eugen. The Hood had misidentified the German vessels. The Prince of Wales, realizing Hood’s mistake, immediately started firing upon the Bismarck. Within minutes, all four ships were firing at each other.

The Germans were concentrating their fire on the Hood and quickly found her range. After the third salvo of shells from the German ships, the Hood was hit, possibly by shells from the Prinz Eugen, starting a fire on her boat deck.
Now at around 13 km/8 miles apart, the fifth salvo of shells left the German ships. Whilst they were in the air heading towards his ship, Holland gave another order for the British ships to turn to port so that they could bring a full broadside to bear on the Germans. As the bow of the Hood started to come around, there was a massive explosion, and almost instantly the ship broke in half as a massive column of smoke and fire shot high into the air.
The Prince of Wales, following close astern, had to make an emergency turn to avoid the wreckage of the Hood. As they passed the scene, the stern of the Hood had already disappeared, and the bow rose up and into the sky before slipping back into the deep, dark ocean. In that brief moment, 1,415 people lost their lives.
Only three survivors were ever found.

With the Hood gone, the Germans now concentrated their fire on the Prince of Wales. Just after 06:00, a 38 cm/15 in shell from the Bismarck tore through the compass platform, killing or wounding everybody there except the ship’s captain.
Having received a number of hits from both the Prinz Eugen and Bismarck, the Prince of Wales made smoke, turned away, and broke off the engagement. In less than 10 minutes, it was all over. The British had received a bloody nose, which caused a serious loss of morale in the UK when the news broke, but the British weren’t in favor of letting the Germans get away.
Fortunately for the British, the Prince of Wales had managed to hit the Bismarck three times, and two of these hits would prove decisive. One hit forced the Bismarck to shut down two of her boilers due to flooding, which caused her to lose speed. Also, a hit forward caused more flooding that left the Bismarck trailing streams of heavy fuel that the British could follow.
Lutjens knew that he couldn’t carry on his mission without getting his ship repaired first, so just after 08:00, he changed course for France. Suffolk, Norfolk, and the Prince of Wales, still following the German ships, altered course as well. They all headed towards the French coast.
Later that day, Lutjens gave orders for the Prinz Eugen to carry on the raiding mission by herself and gave permission for the ship to detach. Just after 18:00, whilst the ships were passing through a rain squall, the Bismarck turned to confront her pursuers. This unexpected maneuver startled the British, and both the Bismarck and Prince of Wales started firing at each other. Whilst neither side scored any hits, the Prinz Eugen had managed to slip away undetected and head into the Atlantic ocean alone.

Then followed one of the greatest naval chases of all time. Every British naval ship in the area headed out to cut the Bismarck off from reaching the safety of the French coast. In the end, they succeeded, and the Bismarck was finally sunk at 22:40 on May 27.
The Prince of Wales would be repaired and returned to service only to be sunk by Japanese airplanes on December 10, where she became the first battleship to be solely sunk by aircraft in open seas.
The Prinz Eugen ultimately had to abandon her commerce raiding mission due to fuel and machinery problems and headed to Brest for repairs docking on June 1.
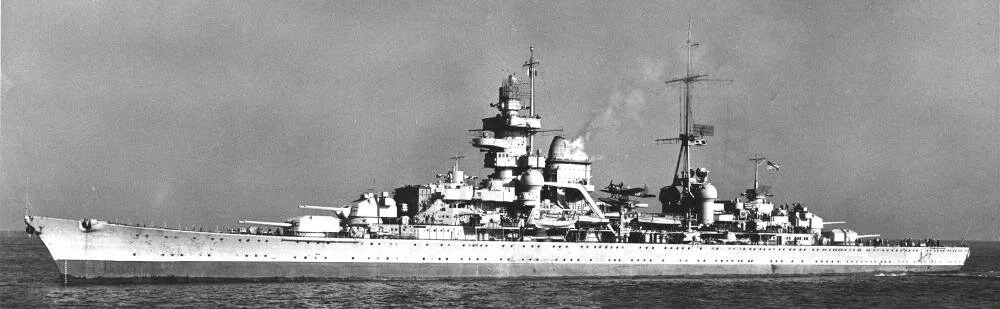
The contract for building the Prinz Eugen was placed with the Krupp Germaniawerft shipyard in Kiel, Germany, in November 1935 with her keel being laid down the following April.

In the presence of Adolf Hitler and other select guests, the ship was launched down the slipway on August 22, 1938, to much fanfare.
Also in attendance was the Hungarian Regent, Vice-Admiral Mikios Horthy de Nagybanya, the last Fleet Commander of the Austro-Hungarian Navy, and briefly Captain of the Austro-Hungarian battleship Prinz Eugen during World War I.
The German Navy was originally going to call the Prinz Eugen “Tegetthoff,” after Admiral Wilhelm von Tegetthoff, who had delivered a crushing defeat to the Italian Navy during the Seven Week War in 1866. Hitler, however, not wishing to offend Mussolini and his new Italian allies, decided on naming the ship Prinz Eugen instead.
After her exploits with the Bismarck, the Prinz Eugen spent the rest of 1941 docked in Brest. With her were the German battleships Schamhorst and Gneisenau. There they became the focus of regular bombing attacks by the RAF, and it quickly became clear that their situation would soon become untenable if they stayed in Brest.
Hitler decided that the ships should be redeployed and that they should make for Norway to support operations there. The ships had a number of options for the journey to Norway. Prinz Eugen could retrace her steps and follow the route back through the Denmark Strait that she had taken with the Bismarck, or she could take the shorter but more dangerous route through the English Channel. Hitler decided the ships should make a daring dash through the English Channel.
On February 11, the three German ships and their escorts managed to slip undetected out of Brest and started their perilous journey toward the English Channel. Although both the Scharnhorst and Gneisenau hit mines, they all managed to slip by the British forces and, once again, the Prinz Eugen had humiliated the British.
That humiliation, however, was short lived again on February 23. During their journey to Trondheim, the British submarine HMS Trident managed to hit the stern of Prinz Eugen with a torpedo, causing serious damage.
After repairs in Germany were completed, the Prinz Eugen spent the rest of the war in Baltic waters. Prinz Eugen saw out the war supporting German forces on the Eastern Front as they were pushed back by the Russians. In March, she fired almost 5,000 shells from her 10 and 20 cm/4.1 and 8 inch guns, bombarding Russian-held positions. Prinz Eugen sailed for Copenhagen on April 19 where she joined the German light cruiser Nürnberg.

As the war in Europe headed towards its conclusion, the Prinz Eugen was ceremonially decommissioned by her crew on May 7, and was taken over by the Royal Navy the following day. From Copenhagen, the Prinz Eugen was escorted to Wilhelmshaven by the British cruisers HMS Dido and HMS Devonshire; once there, the Prinz Eugen was dry docked.
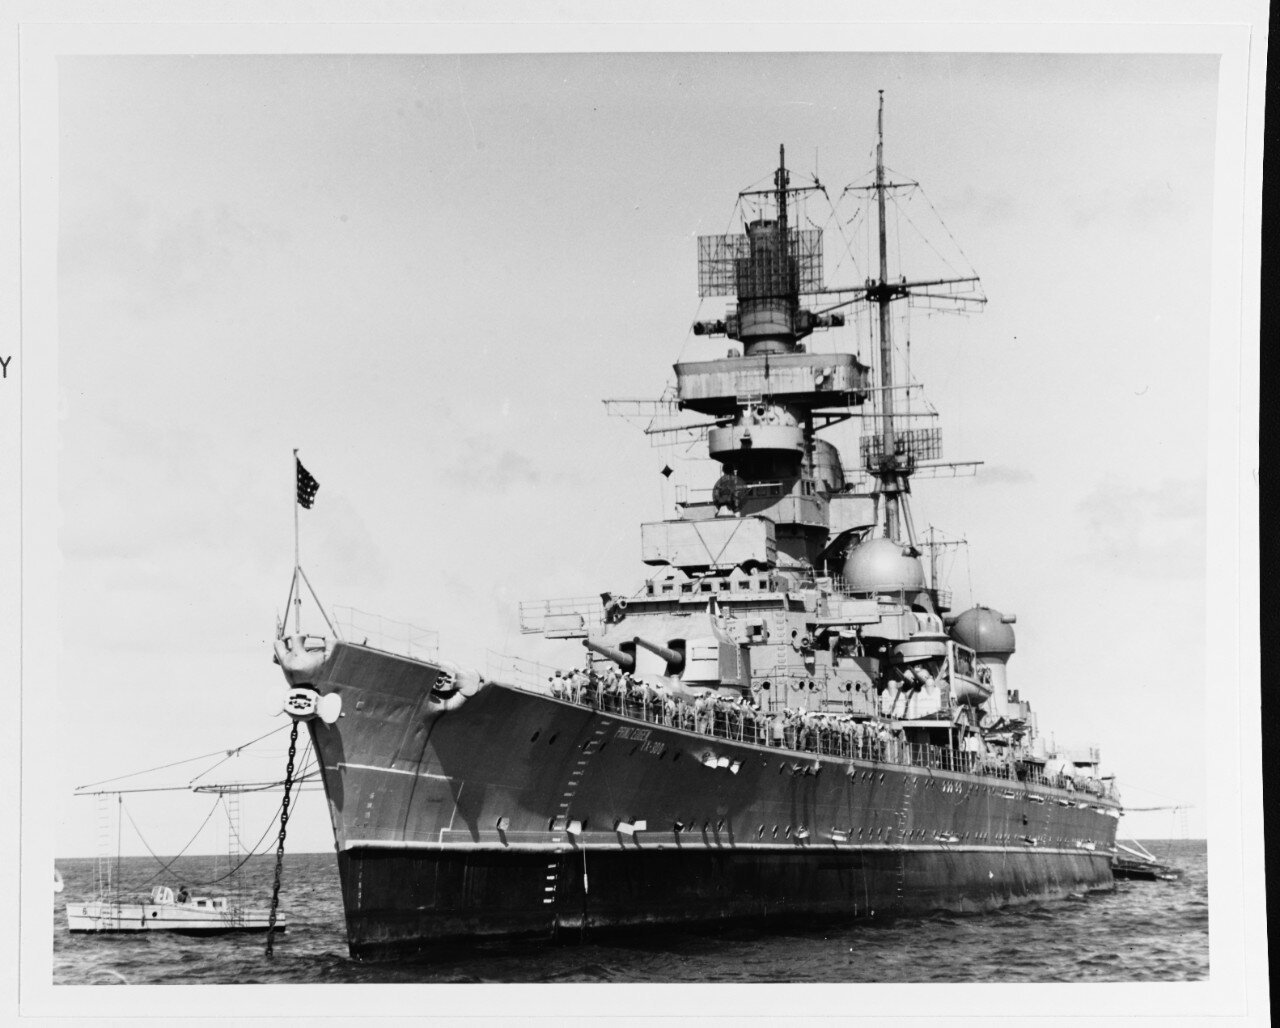
Although the Americans didn’t have a use for the Prinz Eugen, they were keen for the ship not to end up in Russian hands. In the end—to stop the arguments—the remains of the German fleet were divided up into a series of lots which were drawn from a hat. The Americans drew the Prinz Eugen. The Prinz Eugen was commissioned as a war prize into the US Navy on January 5, 1946. She soon departed Bremerhaven for Boston with a mixed American-German crew consisting of 574 German officers and sailors, supervised by 93 American officers and sailors under the overall command of US Navy Captain Arthur H. Graubart.

After an uneventful journey, the Prinz Eugen arrived in Boston around January 22, and the US Navy began examining their new prize. The large, passive sonar array that had proved so valuable to the Prinz Eugen for detecting other ships and submarines were removed and installed on the submarine USS Flying Fish for testing.

The ship was then moved to the Philadelphia Navy Yard where investigations of the Prinz Eugen’s fire control system could be carried out, leading to the removal of her front 20 cm/8 in guns.

By May 1, the last of the German crew had left the ship and were returned to Germany.

The Prinz Eugen arrived in Bikini Atoll the following month with just a skeleton American crew onboard to be used as part of Operations Crossroads nuclear testing.

For the first nuclear test designated “Able,” the Prinz Eugen was moored around 1,100 m/0.70 miles from the planned zero-point above USS Nevada; for the second test, “Baker,” the ship was moored around 1,600 km/ 1 mile from the detonation point under LSM-60.

After both tests, the Prinz Eugen was relatively undamaged but—as with other ships that survived the second explosion—she was now highly radioactive.

Along with a number of other vessels, the Prinz Eugen was towed to Kwajalein for decontamination and was largely forgotten about until December 21, when she was observed to be listing with her stern low in the water.
Attempts were made to beach the Prinz Eugen on Enubuj Island in Kwajalein Lagoon, which ultimately failed when the ship grounded on a coral ledge just offshore.

The ship continued to take on water and capsized in the early hours of the following morning. Due to the radioactive contamination, not much could be done and the ship was left where it was. The ship was resurveyed again in the seventies and found to be radiation-free, although the report noted that all the ordnance still onboard and residual fuel would need to be removed before salvage operations could be carried out; so, once again, nothing was done. The report did state, however, that all the fuel should be removed within the next 30 years whether the ship was salvaged or not.

In the end, it took until 2018 when a US Navy-led salvage team from the Navy’s Supervisor of Salvage and Diving (SUPSALV) successfully removed 229,000 gallons of fuel from 173 tanks on the Prinz Eugen. Using a method called hot tapping, the fuel was pumped onto an oil tanker moored nearby for disposal and recycling. The tanks were then resealed to prevent leakage of any residual fuel left in the tanks.
Diving the Prinz Eugen Today
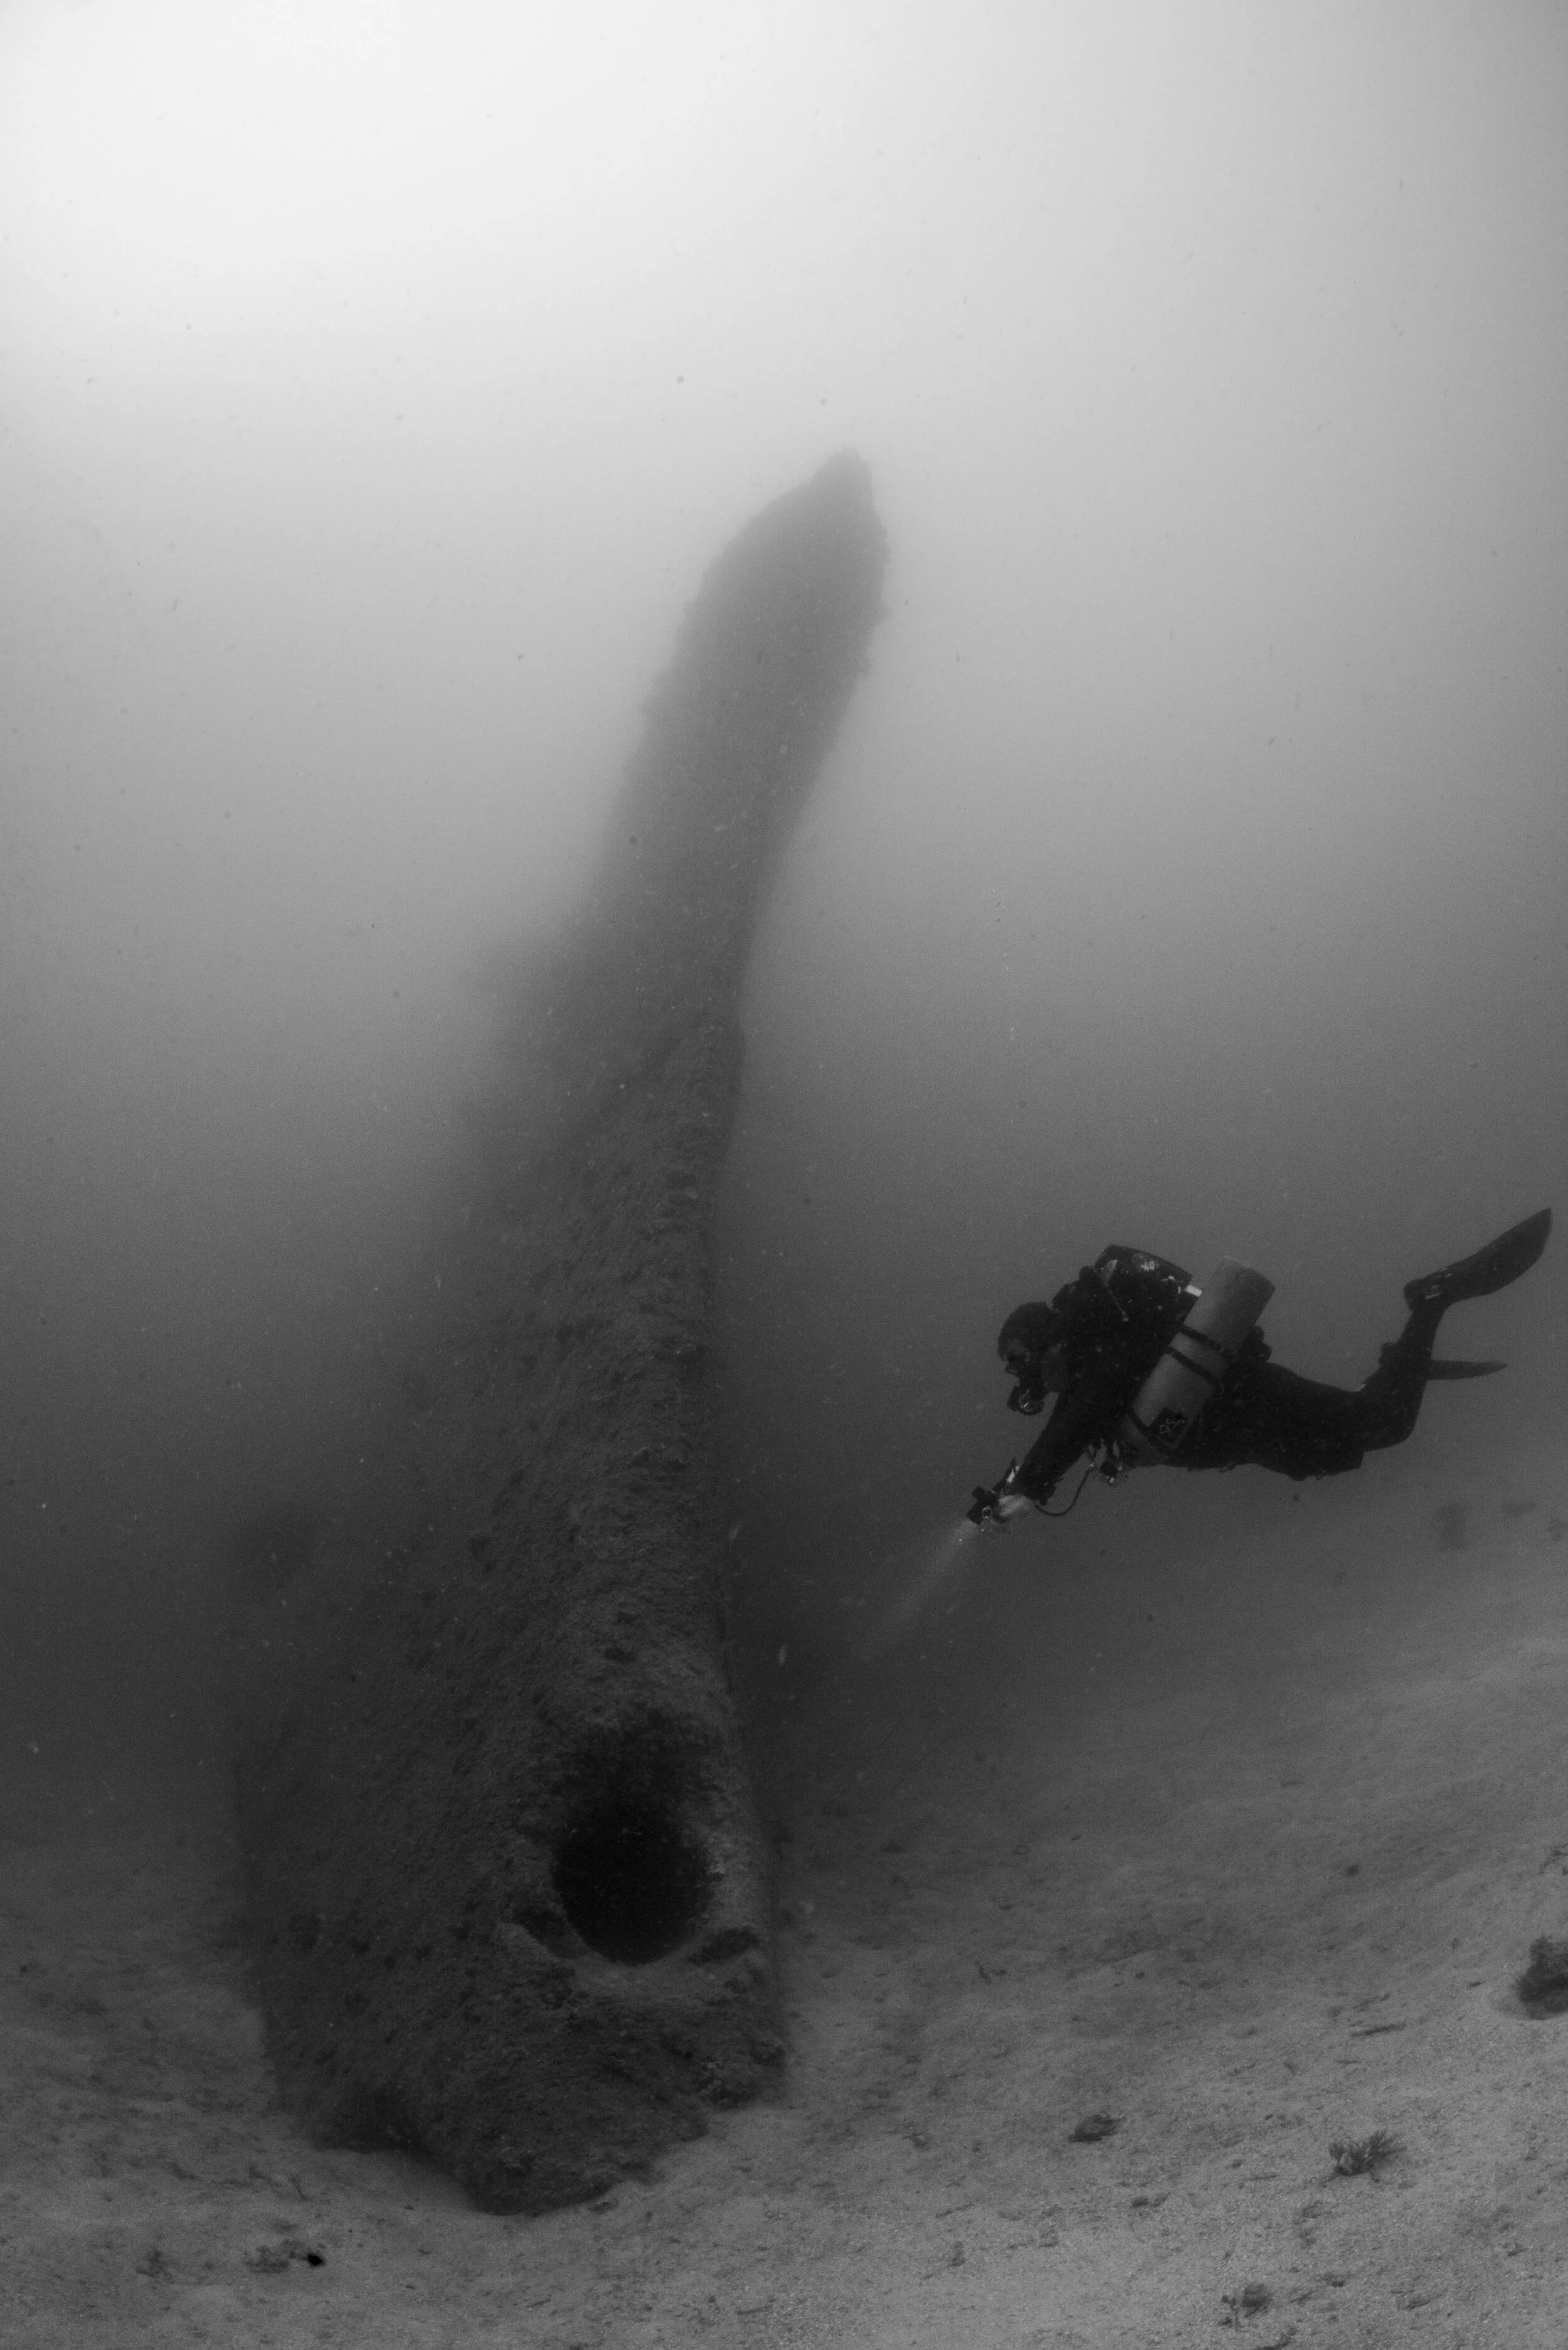
Nowadays, two of the ship’s three propellers can be seen poking out of the water at low tide. The third was salvaged in 1979 and is now on display at the Laboe Naval Memorial in Kiel, Germany.
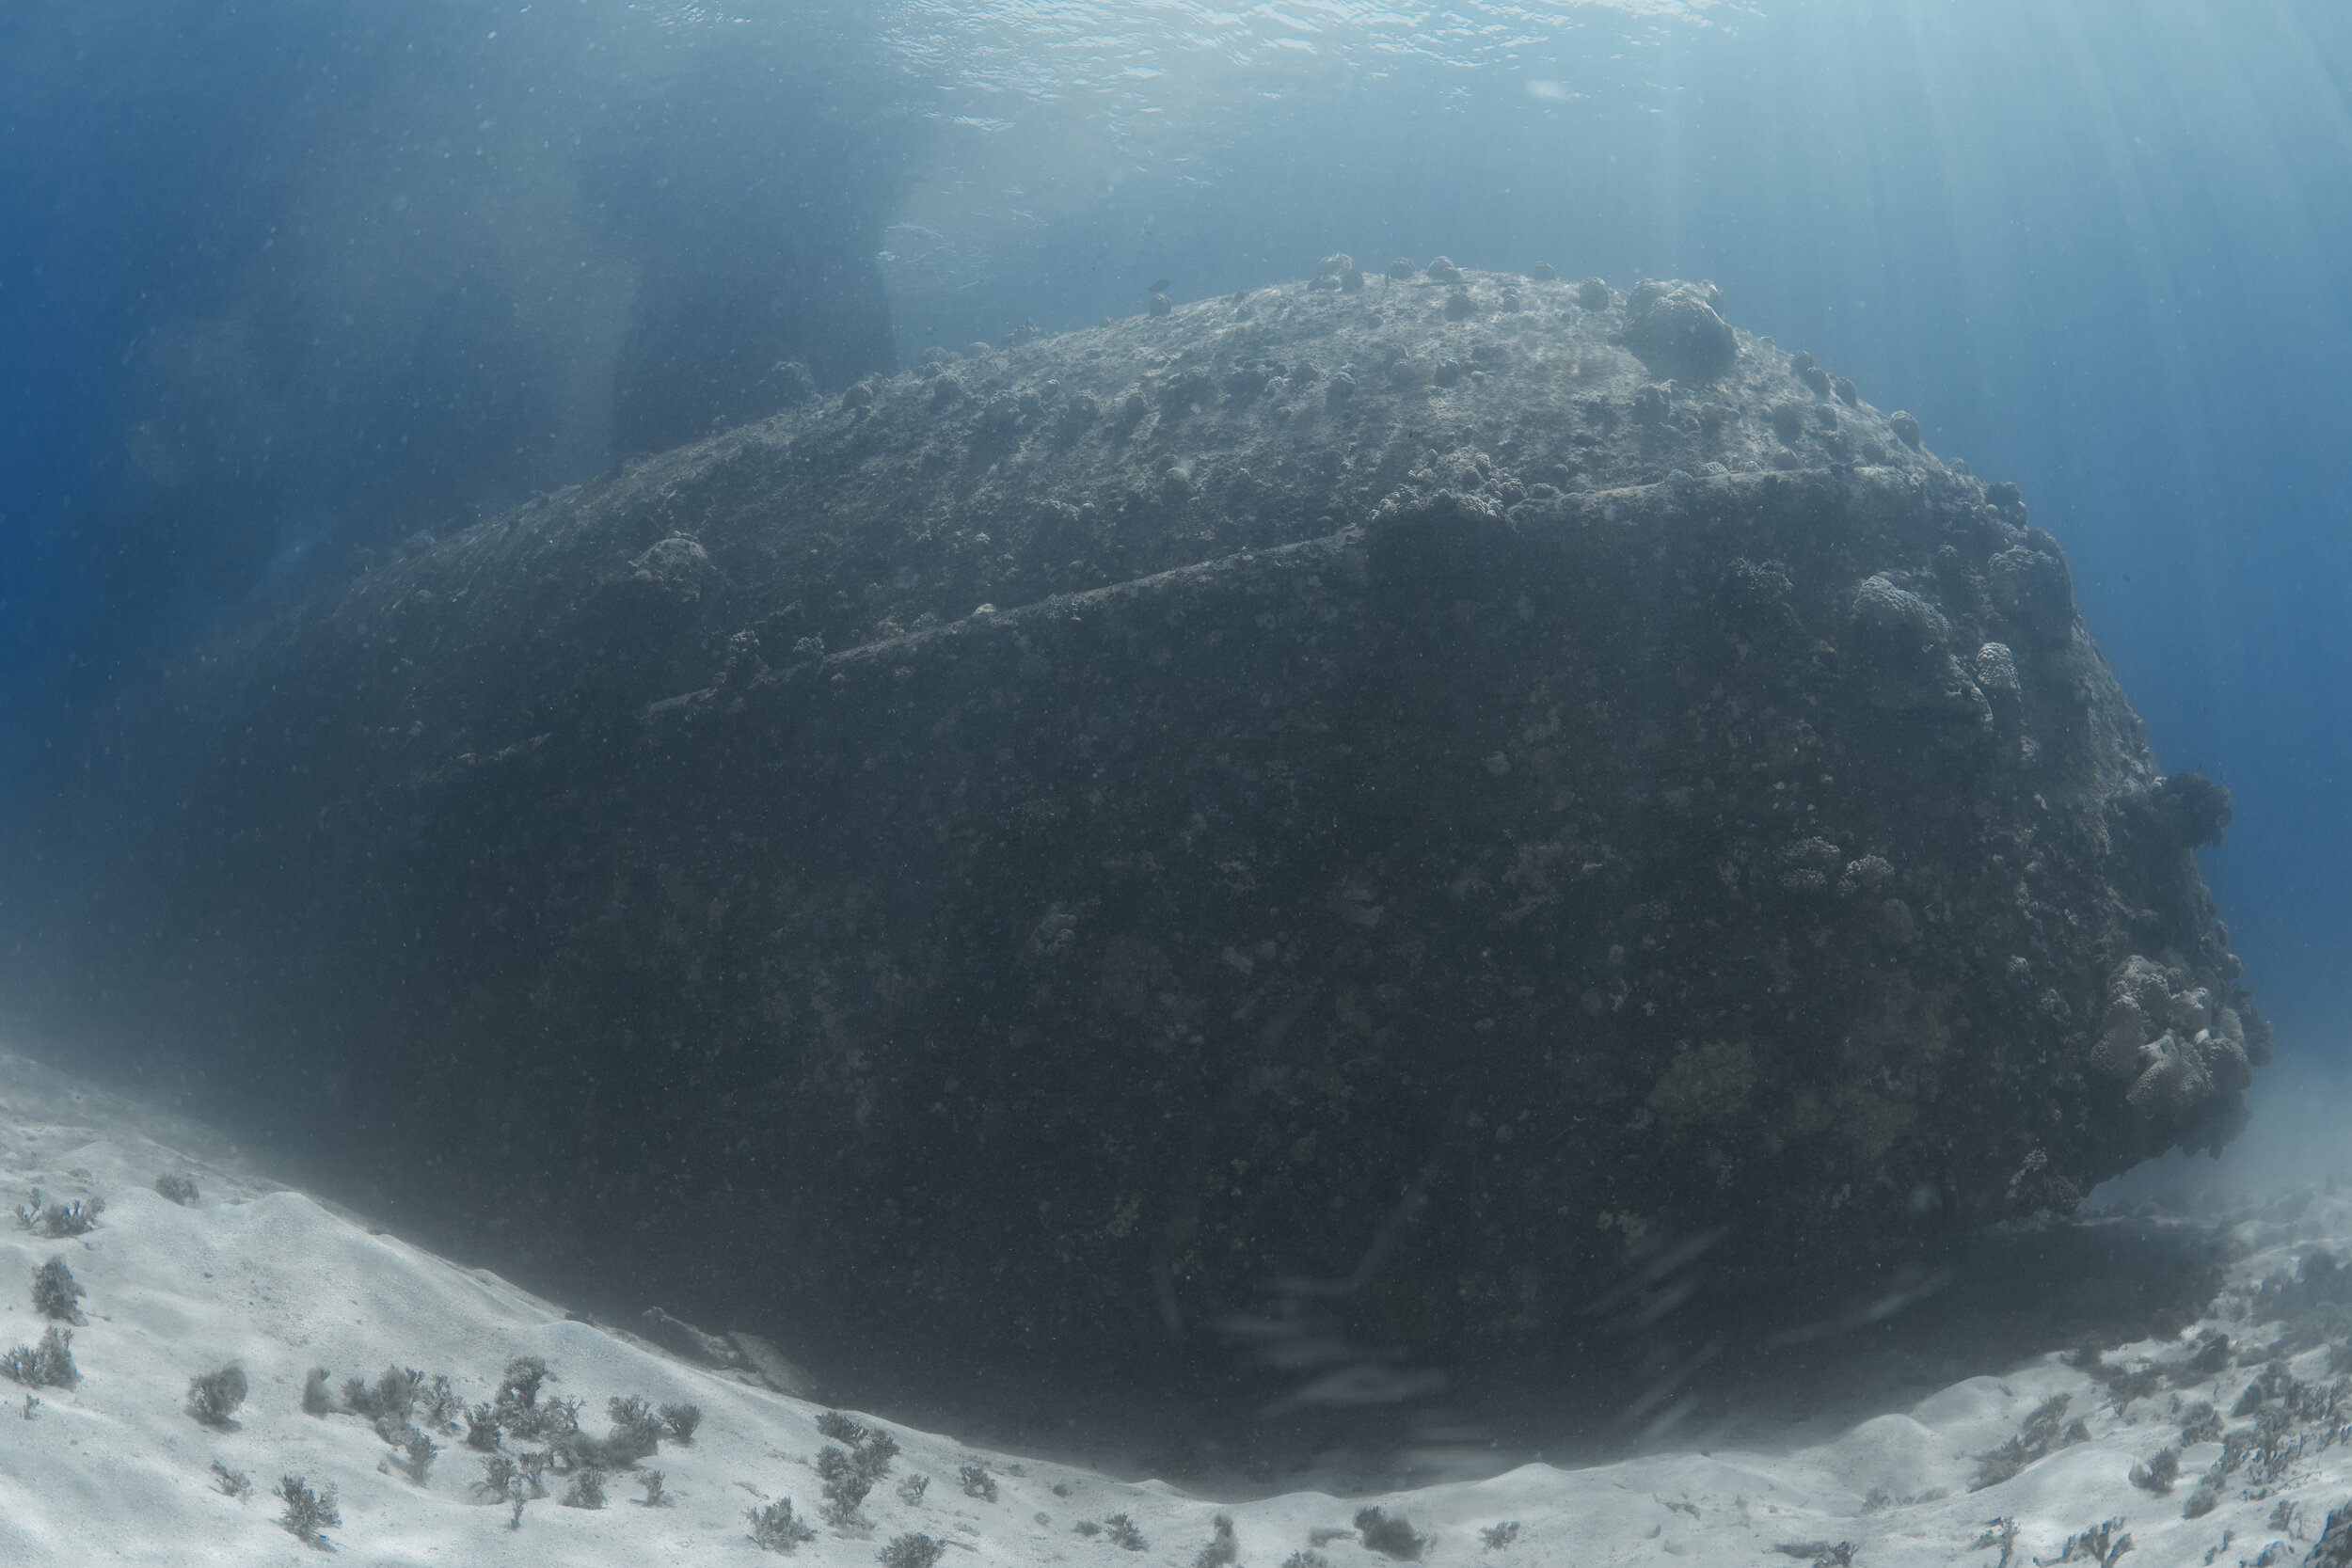
From the stern, the upturned hull stretches out and disappears into the crystal blue water of the lagoon. Divers can drop down to the seabed 12 m/39 ft below neat rows of portholes that allow them to peer into the aft compartments. Toward the bow, the seabed slopes away leaving the bow hanging in mid-water at around 36 m/117 ft.

As divers head toward the bow, two barrels of the aft 20 cm/8 in guns come into view as they lie on the seabed. Above the gun barrels is a hatchway into the wreck.

This offers divers the chance to explore the aft compartments inside the wreck. As the ship capsized, most of the ship’s upper superstructure was crushed underneath the ship as she rolled over.
Some parts of the superstructure broke away, however, masts and gun directors lie scattered in the sand around the vessel. On the vessel itself, divers can find anti-aircraft guns and torpedo launchers still armed with torpedoes.

An open hatch allows divers to view racks of spare torpedoes in their storage compartment.

Various openings allow exploration of the topsy-turvy world inside the vessel. Off the main corridors are cabins with upside-down beds and tables fixed to what is now the ceiling with chairs that have fallen to the now floor.

Some lines have been laid inside the vessel in the past, but these shouldn’t be relied upon for navigation.
Divers glancing out into the blue from inside the ship will often see reef sharks and eagle rays cruising by, and the crevices on the upturned hull are favorite hiding places for the many octopuses that can be found on the wreck.

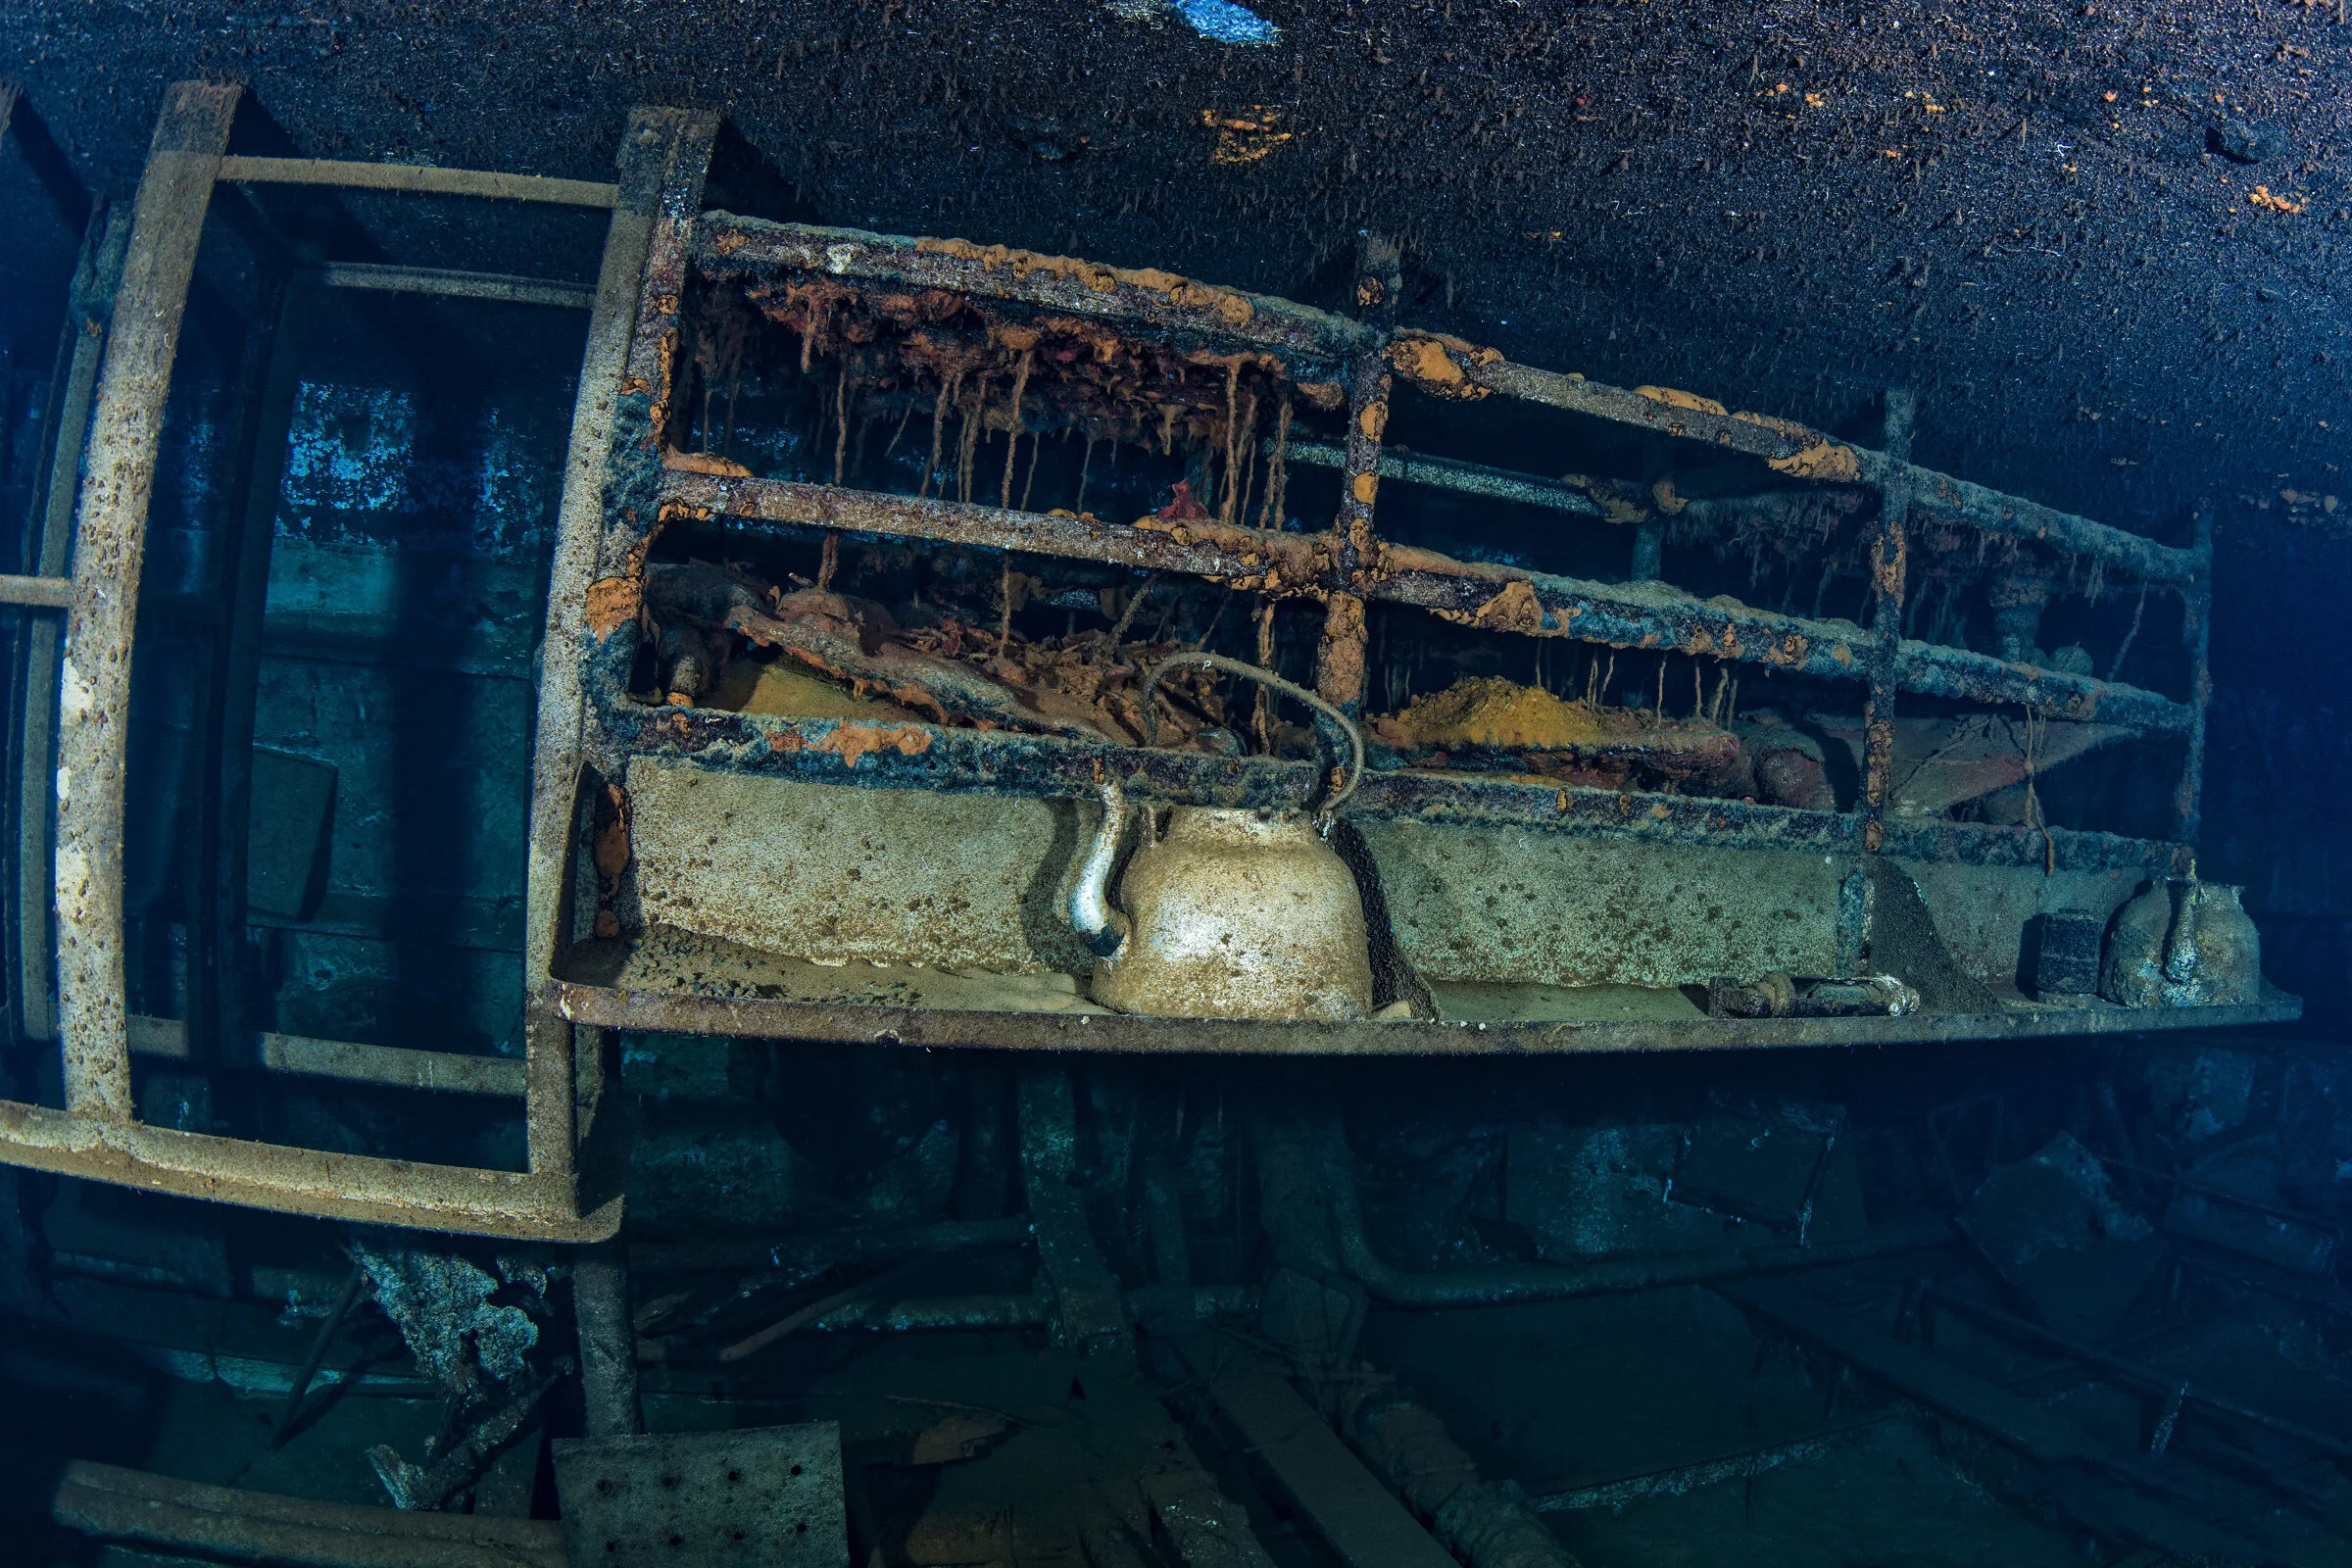
Venturing deeper into the wreck, machine, and generator rooms can be found along with galleys, mess decks, heads (toilets), bathrooms, and storage rooms.

Even though the Prinz Eugen isn’t a particularly deep wreck, one’s time underwater soon comes to an end. With so much exploration to do, time passes quickly.
As we like to say at Dirty Dozen, “So many wrecks, so little time.”

About The Author
Without Martin, The Dirty Dozen Expeditions wouldn't exist. A few years back, Aron and Martin spent a full year diving together in Truk Lagoon. One evening, after a day of demanding dives, they sat, had a beer, and came up with their ideal CCR wreck dive itinerary.
The first-ever Dirty Dozen trip was the result of that beer and the rest is history. Martin has lived in Truk for eight years with his family and works as the skipper of our expedition vessel in Truk and Bikini.

Photography by Martin Cridge and Aron Arngrimsson